The Perfect Summer BBQ: How to Grill Corn on the Cob to Perfection

Introduction to Grilling Corn on the Cob
Grilling corn on the cob is a delicious way to enjoy fresh sweet corn during the summer months. Grilled corn is charred and flavorful, without all of the mess of boiling or steaming your corn. Grilling results in a bright flavor that brings out all the natural sweetness of fresh ear of corn. This guide will walk you through everything you need to know about grilling perfection for your ears of corn.
When selecting ears of corn for grilling, always make sure to buy freshly picked sweet corn from your local farmer’s market or grocery store when it is in season. Corn that has been sitting in storage may not have as much flavor as freshly picked or “on-the-vine” ear – but no matter what type you end up with, it will still be delightful once cooked on your grill!
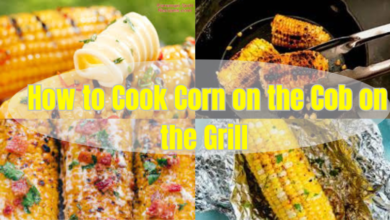
Shuck away any extra husks and silks before placing directly onto an oiled hot grill over medium heat; if necessary, use long tongs to keep them turned over so they do not burn. Cook on each side for 4-5 minutes until they start to char; you can press down lightly with cooking tongs while cooking, which helps evenly spread out any residual butter and seasoning added prior to grilling. Once cooked through, remove from heat and let rest a couple minutes before serving with butter, salt & pepper and/or other condiments like lime wedges or salsa!
Grilled sweetcorn can be enjoyed warm as part of an accompaniment for grilled dishes such as burgers or hot dogs – or simply served in its own right as an amazing side dish packed full of flavor!
Ingredients and Tools Required
When it comes to cooking, having the right ingredients and tools on hand can make all the difference. Whether you’re an experienced cook or a novice in the kitchen, having these two essential items will ensure your meal comes out just as delicious as it should be.
Ingredients – these are the staples that you will need in order to prepare your dish. Depending on what you’re attempting to make; they could range from meats, cheeses, and other produce to spices and sauces. It’s important when going grocery shopping to read through any recipes you plan on making carefully so that nothing is overlooked when it comes time to actually cooking.
Tools – this refers to all the equipment necessary for preparing food safely and efficiently. Items like pots, pans, knives (also referred to as “cutlery”), measuring cups/spoons, graters and in more modern kitchens: food processors, blenders etcetera Certain things such as oven mitts or hot pads should be kept close by whenever using any hot pieces of cookware in order to prevent burning yourself – safety first! It may also be beneficial for larger meals to consider getting sturdier dishes (e.g.: Pyrex casserole dishes) instead of plastic ones if baking is involved at any stage of cooking.
Having both ingredients and tools on-hand can seem daunting at times but planning ahead will save countless headaches further down the line when preparing meals for family or friends; not just because it saves time but ultimately because you won’t have sudden realization “Hey wait I forgot something… oops!” moments right when dinner starts being served up!
Step-by-Step Guide to Grill the Perfect Corn on the Cob
Grilling the perfect corn on the cob might seem intimidating, and often times when it is done wrong or undercooked, can leave us with a less than appetizing experience. Before you give up on grilling corn, try following this step-by-step guide for vibrant yellow kernels that will melt in your mouth.
1. Start by prepping your ears of corn. Peel away any dried out husks and remove all of the little hairs that stick to the ear of corn. Soak them in cold water for 10-15 minutes while you get your grill ready to go. This helps create additional steam inside of the cob, which allows for an even cooking process.
2. Prepare your grill to medium heat (400 degrees F). While the grill is preheating, sprinkle each ear generously with salt and pepper and lather lightly with butter or oil – whichever flavour profile you prefer! However, we advise against using margarine – another flavour element entirely! Once seasoned to taste pull back any remaining husk over the cob and tie around each end with some twine or string for easy handling once thrown on the hot grill surface later on.
3. Time to place those cobs directly onto the heated grates. As soon as they hit these hot grates start rotating them every 1-2 minutes (tongs help here!) until those cob turns bright golden yellow colour – approximately 8 minutes in total per side if cooking at 400 degrees F (204 degrees C). Once slightly charred all over at this point, check one ear for doneness by cutting off one end of an entire cob into 2 pieces making sure not to cut too deep into lower parts of rowed kernels as there might be still uncooked segments inside of here – indicator suggesting need form additional few moments spent around fire before consuming favourably cooked dishes!
4 Push with fork – probing sensation should suggest moderate amount softness signally readiness to be devoured right after leaving hot grates behind – dig in folks! Enjoy ????
Common Questions & Answers About Grilling Corn on the Cob
Q. How long does it take to grill corn on the cob?
A. Great question! Grilling corn on the cob should take about 10-15 minutes, depending on the equipment being used and the heat setting of your grill. For best results, start by preheating your grill over medium-high heat (about 350°F). Next, place your corn cobs directly onto the grate and let them cook for 5 minutes per side or until desired tenderness is achieved. Once finished grilling, remove from the heat and cautiously enjoy!
Q. What temperature setting do I need for grilling corn on the cob?
A. The optimal temperature for grilling corn on the cob is around 350°F (or somewhere between low to medium-high heat). A consistent temperature will ensure even cooking on all sides of your cobs in order to get that perfect crunchy texture we all love!
Q. Is it better to husk or not husk my ears before grilling?
A. It depends on personal preference, but generally speaking it’s best to leave at least some layer of husks intact while grilling as this helps keep moisture in and provides area insulation against direct flames and excessive heat during cooking time. The husks will blacken up nicely and provide a nice flavor experience when served alongside that classic roasted taste you get with grilled/barbecued items – a winning combination no matter which way you skewer!
Top 5 Facts About Grilling Corn on the Cob
Grilling corn on the cob is an incredibly popular (and delicious) way to enjoy one of summer’s signature side dishes. But did you know that there may be more to grilling corn than meets the eye? Here are five facts about grilling corn that may surprise you:
1. It’s a Good Way to Lock In Flavor: Grilling your corn is a great way to ensure that all the flavor from your husk, butter and spices penetrate into each kernel as it cooks. The heat from the grill seals in moisture, helping keep your corn from drying out during cooking.
2. Get Creative with Flavors: Sure, butter and salt are classic toppings for grilled corn on the cob — but why not mix up those flavors? Try adding chili powder or fresh herbs like parsley, chives or thyme for a different spin! You can even create compound butters using these ingredients before toping off your cob once it’s finished cooking.
3. Provide Some Protection From Your Flame: Firstly, make sure you give you ears plenty of space between them while they’re cooking — this helps them cook evenly without charring too quickly. To further protect them, wrap each ear in aluminium foil with some butter and seasoning before placing it onto the grill! This will shield the kernels from burning while still allowing them to cook in their own steamy goodness.
4. Longer Is Not Necessarily Better: For perfect grilled corn every time, we recommend 5 minutes per side on a hot flame when grilling directly on the grate (which many people prefer). That said, grilling inside foil only requires about 10-15 minutes for a perfectly cooked dish!
5. Corn Is Not Just for Eating Fresh: Even after taking off its endearing exterior, there are still plenty of ways to get creative with leftover cobs! Cut off any remaining kernels and add them into salads or fritters recipes; puree leftovers with chicken stock for hearty soups; muddle in drinks if feeling adventurous; stir fry any extras with peppers and onions; or use as garnish or side dish by themselves – no matter how you choose to cook yours up — 3 seconds later— boom — Delicious!
With these five facts taken into consideration – now you too can become an expert at getting that perfect grilled summer dish – all safely done right in your driveway, big backyard party or neighborhood potluck! So throw away those overcooked pieces of fridge-stored soft veggies – because letting these juicy gems fire up on that open flame brings an unbeatable taste that no other kitchen item could provide…YUMMM!!!!
Wrapping Up – What You Need To Know About Grilling Perfectly Delicious Corn on the Cob
Grilling corn on the cob is a popular way to prepare this classic summer dish. There are many different methods that can be used to cook corn, but grilling is one of the most flavorful and enjoyable. To ensure that your grilled corn turns out perfectly delicious every time, follow these simple tips.
First, start with fresh ears of corn – look for ears with husks that have no holes or visible signs of damage. Remove any excess silk from the outside of the ear before you begin grilling; this will help it cook more evenly and prevent it from sticking to the grill grate. Soak your ears of corn in cold water for at least 25 minutes before grilling; this step will help keep them moist while cooking on the grill. Discard the soaking water once done and dry off each ear before applying your favorite flavoring or seasonings.
When ready to cook, preheat your back yard/outdoor/indoor grill to medium-high heat (400-450 degrees F). If using an outdoor charcoal or wood fired grill, wait until a good fire is established before starting to cook. Place ears of prepared corn directly onto the hot surface and turn them regularly with tongs as they cook – usually 8-10 minutes total cooking time depending on size of ears and heat level. For added flavor, brush with some oil (olive, avocado) just prior to putting them onto the hot surface if desired. Regular turning helps ensure even cooking all around – not leaving any burned areas behind each kernel gets kissed by smokey chargrilled flavor goodness – yum!
Once nicely charred evenly all over remove from heat and enjoy immediately! Serve with some additional fresh butter & herbs if desired – delicious! Grilled sweet corns served up straight off the cob make for a great accompaniment for burgers and steaks – also enjoyed just as snack all its own right too!
For perfectly cooked deliciously flavored grilled corn you need quality produce, adequate prepping beforehand i e husking & soaking plus good timing both during prepping & actual grilling itself so everything comes together in beautifully cooked recipe ready form! Enjoy!!


